Pre AVL
- Download Summary Files
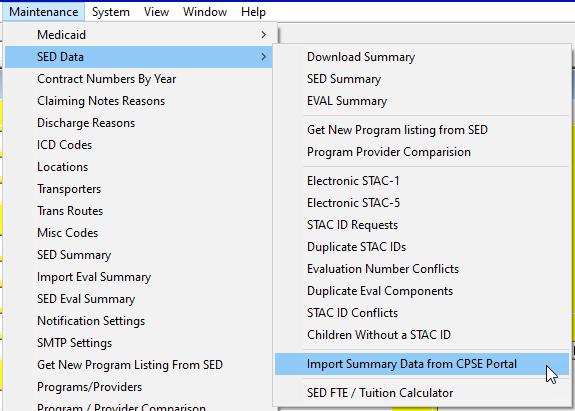
- Maintenance>SED Data> Import summary Data from CPSE Portal
- Select School Year, then select:
- Click on the 'Import Service Summary' button and then click 'Auto Match Services (STAC-1)
- (You will need to do separate imports for each service and for each year)
Service AVL
AVL – Automated Voucher Listing
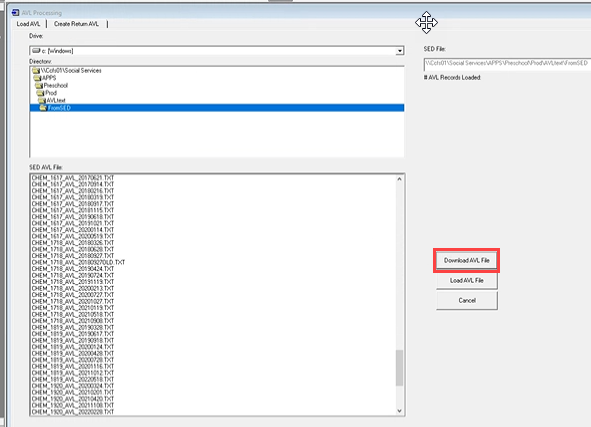
Claims -> Load/Create AVL File
- From SED (Double Click)
- Download AVL File
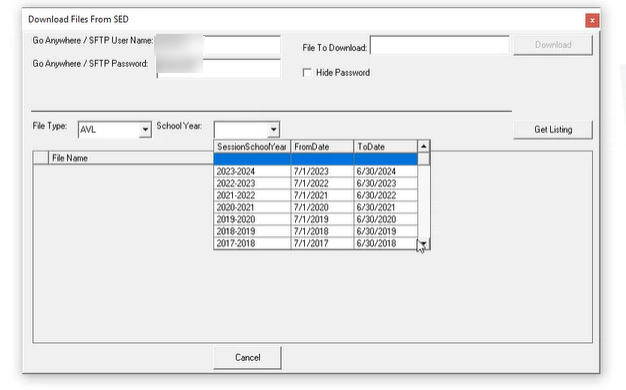
- Enter SFTP/Go Anywhere username and Password
- School year drop-down
- Click 'Get Listing'
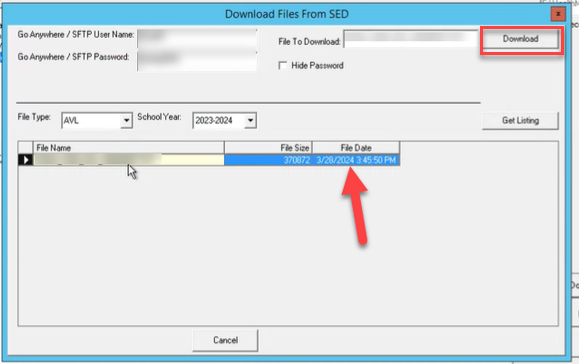
- Highlight file (most recent file date)
- Click Download at the top
- Done
- Double Click the AVL Text Folder
- Double Click on the from SED Folder
- Select/highlight the most recent file
- Click Load AVL file (you will see it loading)
Check for AVL Adjustments
(Alternatively, you can check for adjustments directly at "Claims" -> "Process Adjustments." The Process Adjustments window is also where you reconcile them after finding out that you have some.)
- Reports -> AVL/Claiming -> AVL
- Bottom right -> AVL adjustments
- (if there are adjustments, you must reconcile before finishing AVL)
Claims -> Process AVL
- Select Service Type
- Refresh
- Select All -> Claim
- A Red "F" indicated a Full Claim

- Select Try to Part Claim -> Select All -> Claim
- A Yellow "P" indicates a Partial Claim
- Repeat steps 1- 4 for each Service Type (for all CB, SEIT, and RS)
- Select Service Type
- Refresh
- Select All -> Claim
- Try to Part Claim -> Select All -> Claim
X Out
Claims -> Audit AVL RS/ SEIT sessions (this will not be for CB)
- Run Audit
- Will provide the number of records failed
- Double-click on first
- Edit -> OK -> Yes -> Close
- (When sessions aren’t matching, use as an opportunity to check for problems)
- If there are problems (that cannot be resolved here)
- Claims -> Audit AVL RS/SEIT Sessions
- Select all -> Right Click -> Remove Claim from AVL
- These will go to Unclaimed Payables to review later
Reports -> AVL/Claiming -> AVL
- Print last page, take a screenshot of the table, it will be sent to SED.
- X Out
- If you have adjustments -> Get report (AVL Adjustments)
- AVL breakdown report (if you choose)
Claims -> AVL Check
- Generate AVL Balance Check Report
- Preschool and SED should match
- Print
- X Out
- Should send this to either preschoolsupport@cpseportal.com and copy your support contact, or fax the document to 518-393-9938 at the attention of your support contact.
- Please also include the last page of the AVL Report.
Create Return File
- Claims -> Load/Create AVL File
- Select the Create Return AVL tab
- Create AVL Return file
- Upload AVL Return File
- SFTP/GO Anywhere password
1. Yes – to auto-generate. I
t will autogenerate an email with the SED email (OMSSTAC@NYSED.GOV) and you’ll want to be sure to also include: 2. Include the screenshot of the table from the AVL Report in the email.
Article ID: 195, Created: 2/12/2020 at 3:44 PM, Modified: 5/16/2025 at 8:30 AM