PLEASE NOTE, ONLY SUFFOLK COUNTY PROVIDERS SHOULD BE USING THIS FEATURE AT THIS TIME.
Assigning Students to Classes and Moving Them from One Class to Another
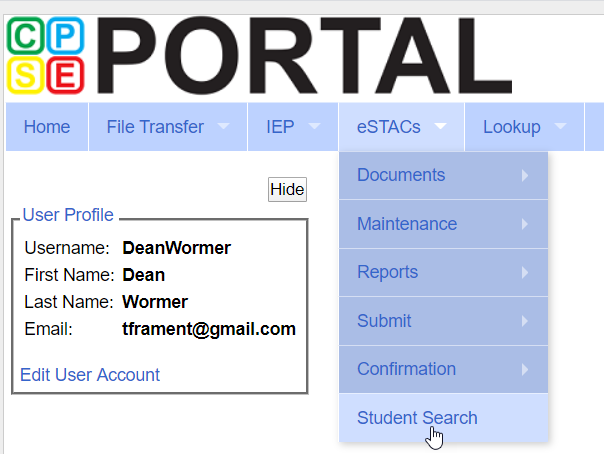
- Start by going to eSTACs> Student Search
- From here you can search for a student already in the system or add a student
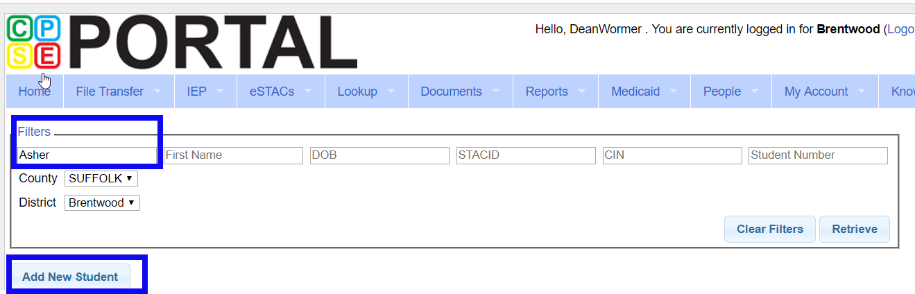
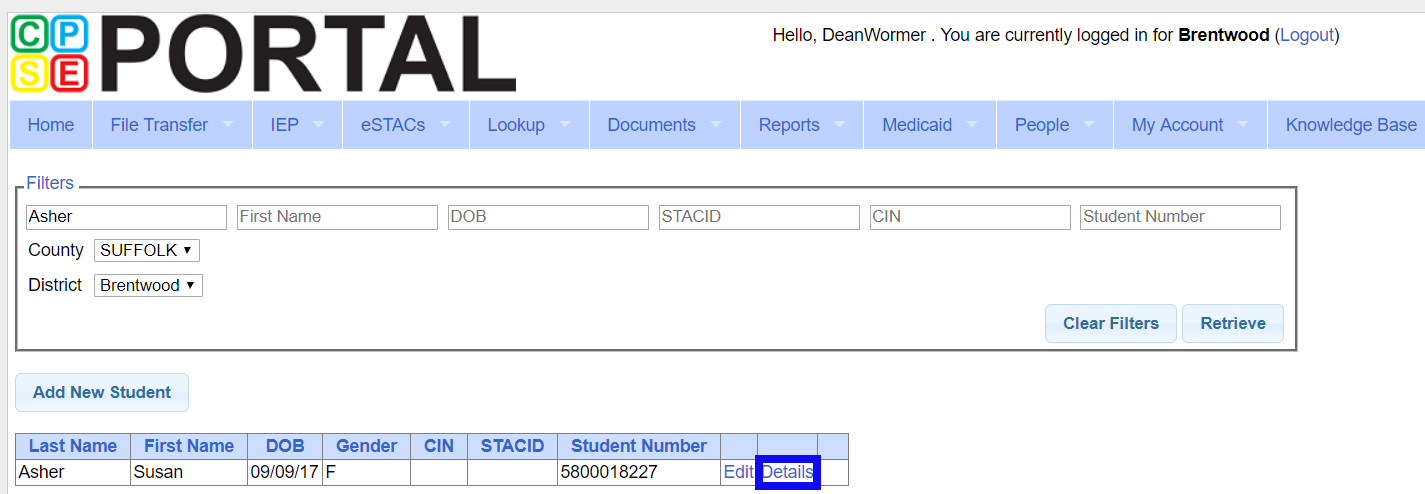
- If you chose to search for a student, you will click on the details button for the student and that will bring you to the Student Information screen.
- If you created a child, you will be brought to the Student Information screen after you save.

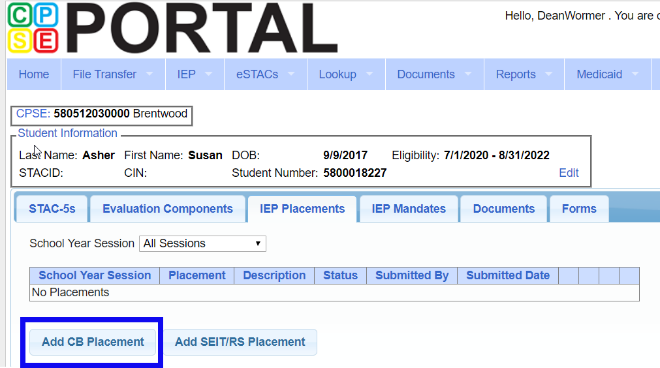
- From the Student Information screen, click on the tab IEP Placements.
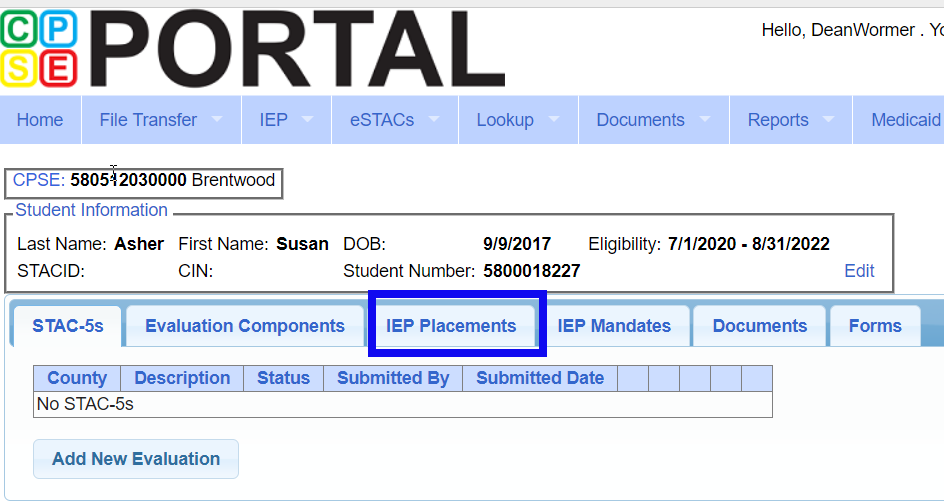
- Once in the IEP Placements tab, click on Add CB Placement.
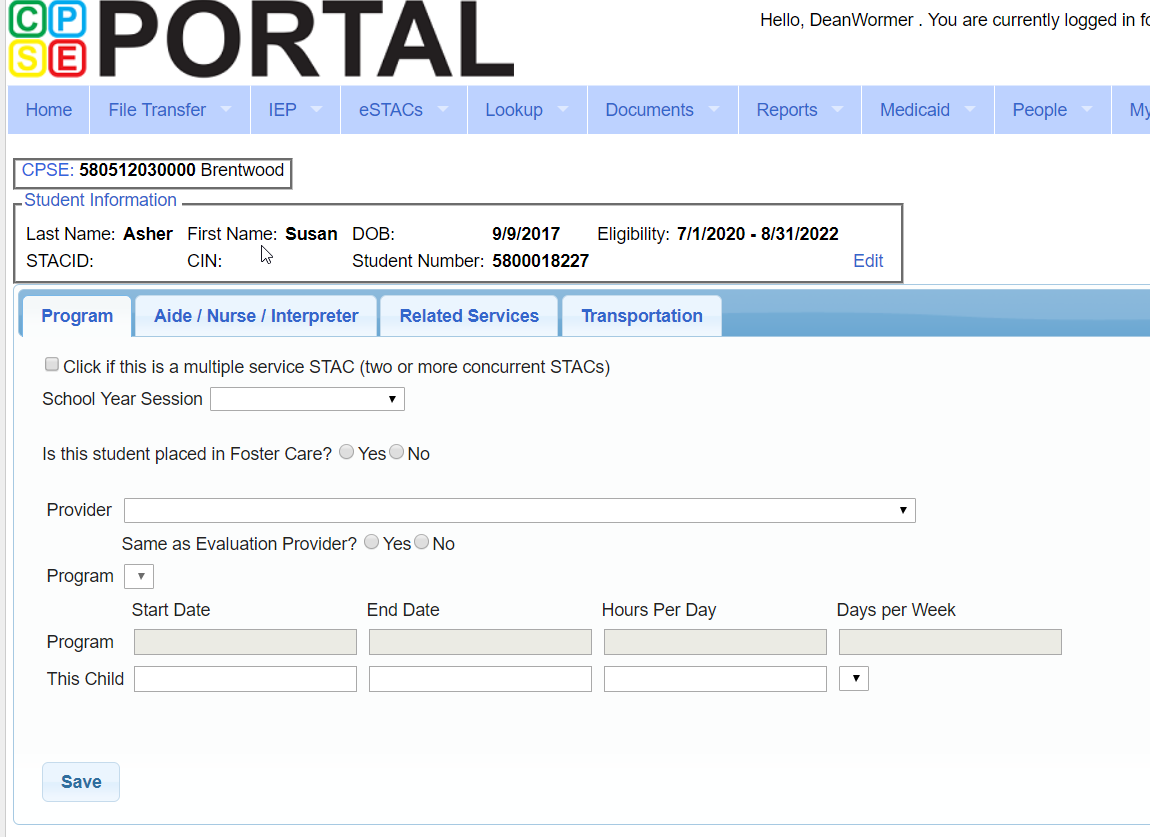
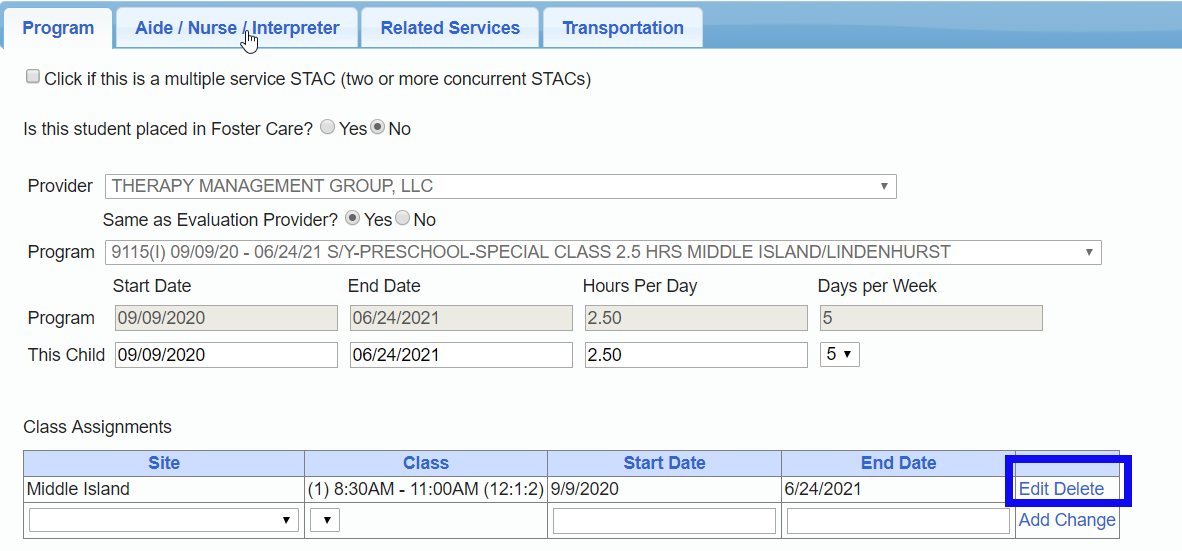
- The next screen is where you will add the CB Placement for the child. You will need to fill out the School Year Session, whether the student is in foster care, the Provider the child is being seen by, whether the Evaluation was done by the same Provider, the Program the child is being assigned too, and updating the students start and end date if it is different than the Program start and end dates. After that information is filled out, you slick on Save.
- After saving the information, a new section will appear called Class Assignments. This is where you will assign the student to a class.
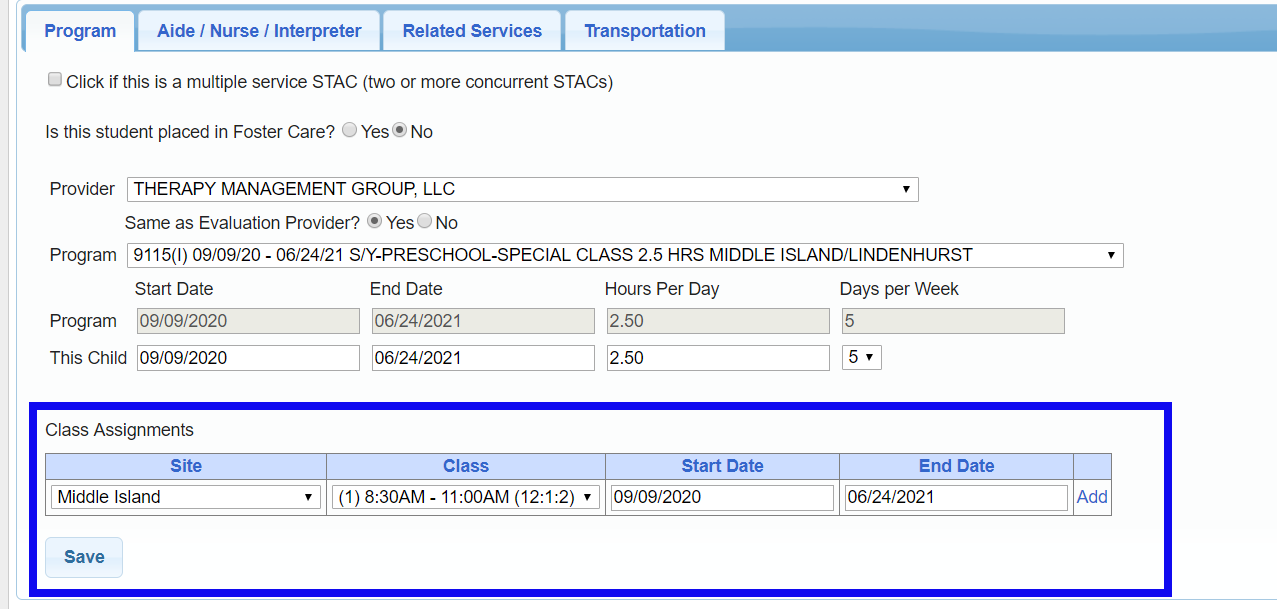
- The Site, Class, and Start and End dates will be driven by the Program selected. Once you have chosen a Site, Class, and the Start and End date, you will click on Add. The student is now assigned to that class.
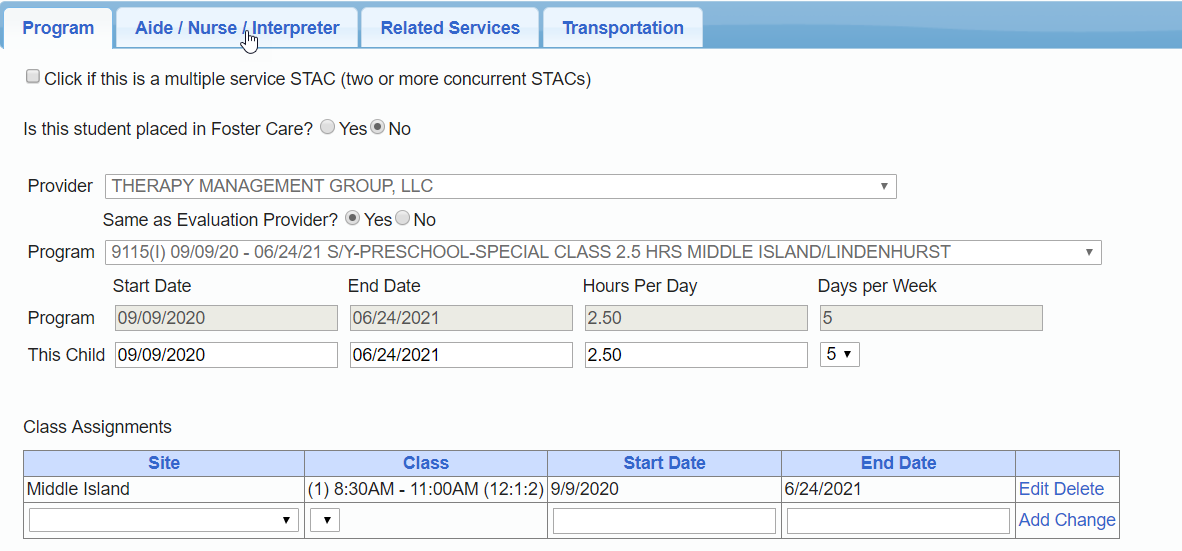
- If the information you entered is incorrect, you can either start over completely by selecting delete or you can edit the information for the Class Assignment. Note that you can only edit the Site, Class, and the Start and End dates. You will not be able to edit the Program after saving the information from step 7.
- If the child moves to a new class, whether it be to a new ratio class at the same site, or a different site with either a new ratio or the same ratio as the previous site, you can capture that by clicking on either the Add or Change buttons. See steps 12 and 13 to see how the Add and Change buttons differ.
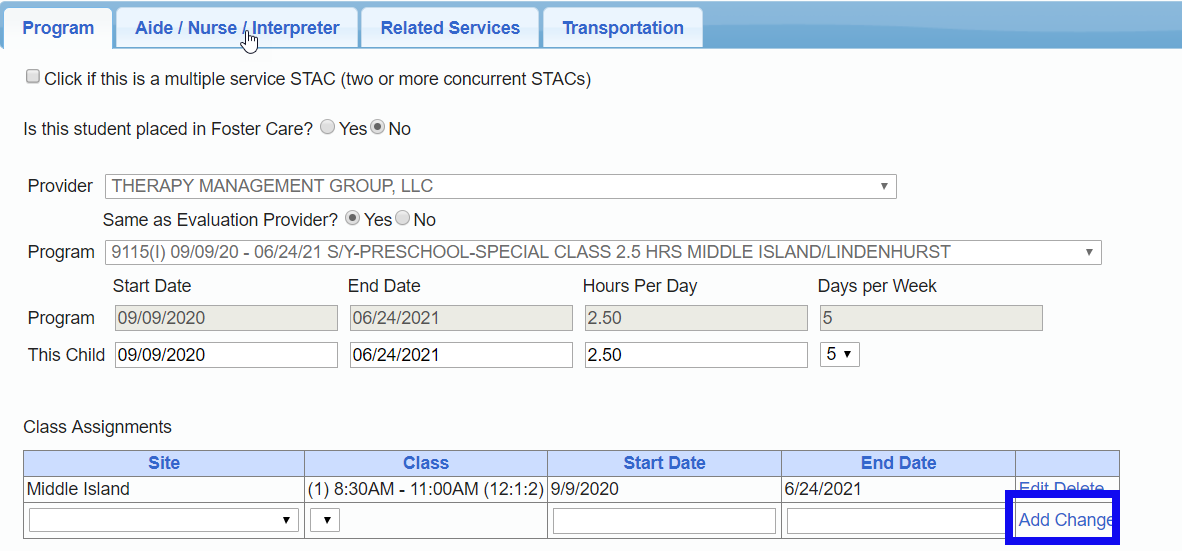
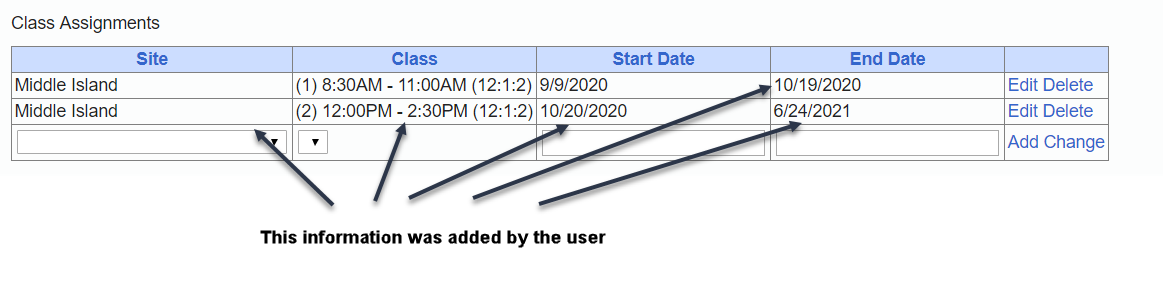
- To use the Add button, you will need to manually input the Site, Class, and Start/End Dates. After you input that information, click on Add and the information will be added. If you do it this way, please note that you will need to change the End Date of the previous class to be one day prior to the new class. You can do this by clicking on Edit for the previous Class, changing the End Date, and then clicking on Update.
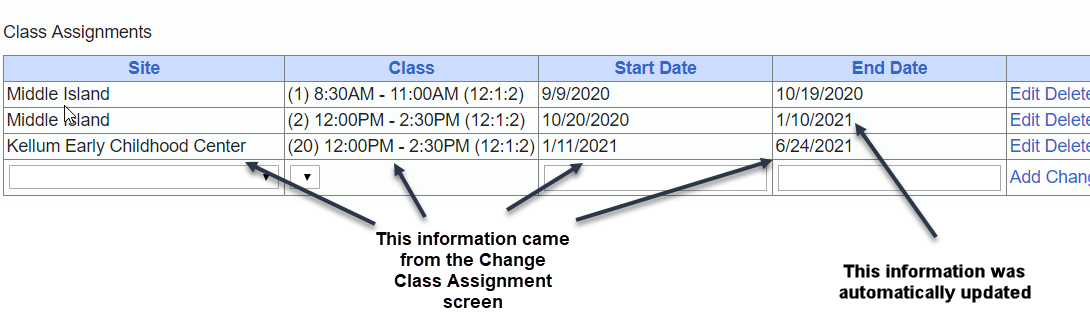
- Using the Change button is a bit more user friendly. When you click on the Change button, the Change Class Assignment will pop up:
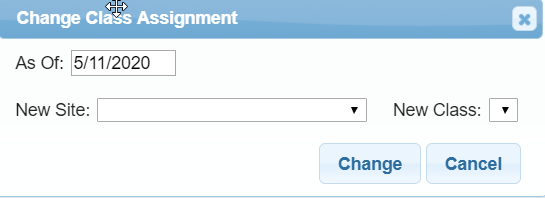
From here, you will put in the As Of date, which is when the student will start at the new site, the New Site (if it doesn’t change you can select the same site), and the New Class the student is transferring too. After you input that information and click on the Change button, the new class will appear in the Class Assignment section and the previous class end date will automatically update to the day before the student starts at the new site:
Keywords:
Class Assignments
Moving Classes
Center Based
Moving Student
Child Placement
CB
Article ID: 222, Created: 5/12/2020 at 4:02 PM, Modified: 3/9/2022 at 9:53 AM